Tuesday, September 30, 2014

Crocheting from both ends!


To say life has been a bit hectic lately would be a gross understatement! We have been running crazy lately. Sort of burning the candle from both ends so to speak. I generally spend 20-30 minutes each day sitting in the car waiting. If I am alone, I enjoy the peace and quiet reading. But, if I have children in the car with me, reading is pointless not to mention frustrating.

Because I am an avid crocheter, and have been for almost 30 years, I can crochet while fielding any number of questions about frogs, pineapples, soccer and whatever else my kids can throw at me. What I cannot do is remember a pattern to save my life! I have made this same headband four times in the last month, and I still cannot remember how many rows it takes. So, you can understand my disappointment when I arrived at a 10 minute wait at school drop off this morning with my yarn and without my directions. I had picked up the directions for the flower, but failed to get the ones for the headband. So, I just started crocheting from the other end! I would not recommend this method of crocheting if you are making a large project, but for this small flower, it was the perfect solution.

By the way, the answer is 55. That is how many rows before the decrease starts! Maybe next time I can remember, but I won't hold my breath.

Monday, September 29, 2014

Balloon Money Pinata Tutorial


An awesome way to gift money!
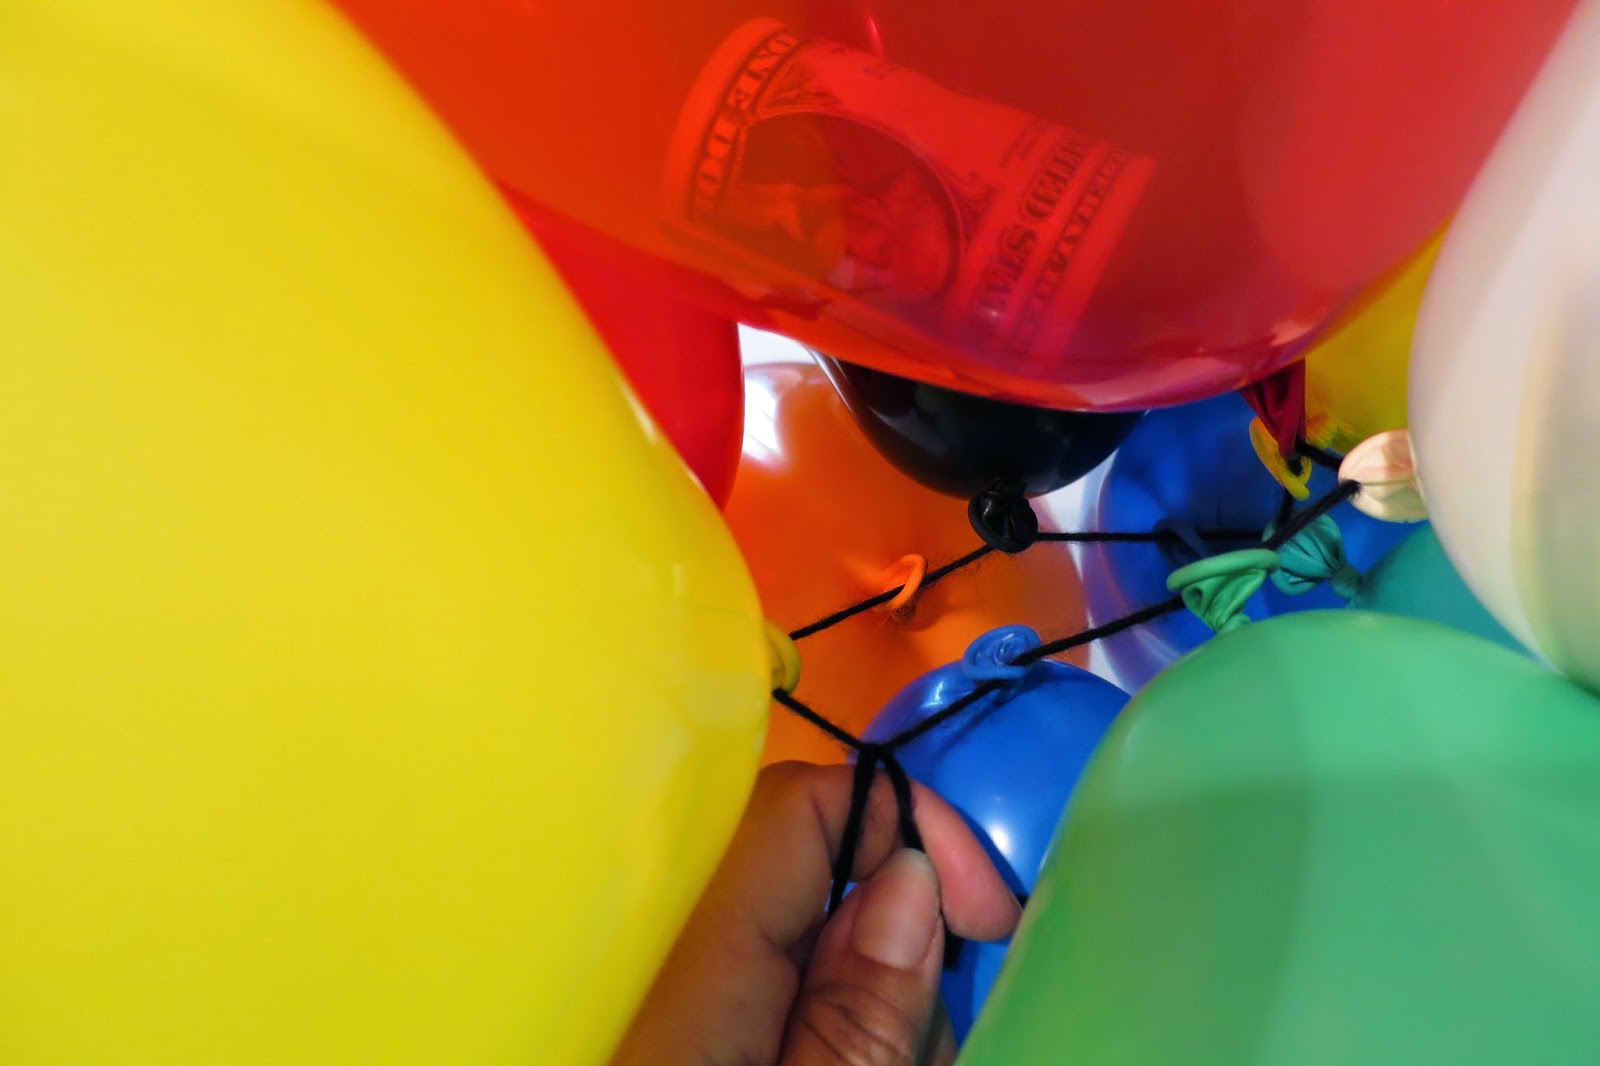
Balloon Money Pinata
 
We celebrated two birthdays this weekend. Both my niece and nephew grew another year older. As is the case when kids get older, they just wanted money. The headphones my nephew wanted were almost $100! He decided to pool his birthday money for this special purchase. But, I really hated to show up with only a card. So, I decided a birthday "balloon money" pinata would be fun! It was a super simple craft & it was fun watching him bust the balloons for his cash reward. My niece pulled her pinata down & let my little guys help her stomp on them.

Supplies needed: 12 Balloons, Money to fill the balloons, Needle, Yarn 

Step 1: Roll money tightly, stuff into balloon, blow & tie balloons

Step 2: Very carefully thread balloons onto yarn. Push needle through just above the ring & be very careful to keep the needle away from the balloons at all times! Keep a long tail to hang the balloon pinata.

Step 3 - When all balloons are threaded onto the yarn, push them close together. Use the rings near the yarn to scoot the balloons toward one another. 

Step 4: Leaving your tail long for hanging, tie a knot near the balloon rings to keep them together. Hang in the doorway!

TA-DA!


Sunday, September 21, 2014

September Easter Bunny

The date is September 21st. It is a Sunday, and all 4 of my boys are napping. I couldn't nap. Ben & I made a hard decision last night. I won't disclose what is is right now, but I will soon. It is the best decision for our family, it is the best decision for me & yet I am sad. So, what is a girl to do? I am drowning my sorrows with the one and only...CHOCOLATE!

Not just any chocolate, the final of my boys Easter Bunnies!


Yep, I'm that mom! The day after Easter they handed over their Easter Baskets. I left about 10 small chocolate eggs and a handful of jelly beans. The rest, we got rid of. It was a little tough, because I know our family loves my children and I know they are allowed a bit of chocolate here and there, but my kids and sugar create a wildness I don't know how to handle. So, I put away some chocolate eggs, some small bags of M&Ms and the three chocolate bunnies in my "secret stash."  My boys did not have a single bite, and they never once thought about them.

Today, the Easter Bunnies are gone. Just in time for the Halloween candy to fill the "secret stash" again!

Monday, September 15, 2014

Memorization with a Silly Cube!

How do you get your little ones to memorize their Bible verses? Repeat, repeat, repeat. But, unless you put a little fun into that repeating, you are going to get some cranky kids. I ran across a brilliant idea while I was teaching this month.

A Silly Cube!

4 and 5 year olds memorizing Bible Verses with the Silly Cube!


What is a silly cube you ask? It is a dice with silly motions on each side. This little idea took me about 5 minutes to create. I simply found a sturdy square box in my gift wrapping closet, some plain red wrapping paper and a permanent marker. My box was about 5"x5"x5" I wrapped the empty box. I used packing tape, so hopefully our cube will last for a couple of months. I teach 4 and 5 year olds, so I don't expect it to last a long time, but it will be fun to change up the silly motions in a couple months anyway. After it was wrapped, I just added the silly motions on each side. We used 1.Hands on head, 2.Jumping, 3.Whisper voice, 4.Touching toes, 5.Standing on one leg and 6.Standing still. It would be fun to have a little drawing so the kids knew what motion to do as soon as it landed, but I have a hard time drawing a stick figure, so I just had to read it for them.

As usual with little kids, don't over think it. They won't care, and you will only upset yourself. My cube was not completely square, and it wanted to land on one side a lot. Of course the side it liked was jumping, and the kids did not mind. We had 6 kids plus me, and we did 3 rounds before they got bored of the cube. So, all-in-all, we repeated our Bible Verse 21 times! You guessed it, all 6 had it memorized by the time we were done. We'll see if it sticks until next week.

What do you do to help your little ones memorize?

Tuesday, September 9, 2014

God's Creation Bingo game for kids

My mom and I have been teaching the 4 and 5 year olds at our church this month. She had the first 2 weeks, and I had the last 2 weeks. Our little kids have been on a different curriculum than the rest of the classes, and it recently ended. The church is waiting to reorder so we can all be on the same schedule again. What that means is we have to find some miscellaneous lessons until the new curriculum arrives. Mom chose a 4 week course on creation from an old lesson book. The kids learned what God created each day, and although some supplies were still around, some have been lost over the years, causing us to fly by the seat of our pants!

Week 4 of this particular lesson was review. I thought it would be fun to go on a scavenger hunt, but the weather did not agree. So, on Saturday afternoon I sat down and made us some "Creation Bingo" cards. The kids loved it. I would call a picture, and they would shout BINGO if they had it. I don't think we ever got the directions right. I would remind them that God made whatever was on the picture, and then we would try to decide which day of creation that particular item was made. So, they were definitely getting reinforcement of the previous lessons. I forgot to get a photo since we were having so much fun. I do however have a PDF of the cards and master pictures I made. Please feel free to use to teach your little ones.


https://drive.google.com/file/d/0B7fHPODvJoANRHVPRUlqSlhqTG8/edit?usp=sharing

All of the cards have exactly the same pictures. Because these were 4 and 5 year olds, I didn't want anyone getting upset if they didn't have a dog, or a banana when I called it. The last two pages of the printout are the master pictures. I printed these out, cut them, and put them in a paper bag to pull out one at a time.

Enjoy!